
Hey, what’s up everyone, welcome back to our newest series here at Ullr Provides. If you have been tracking with us over the past month, you have learned a lot about how to get and stay warm while out in the cold. If you missed out, check out the start of the Stay Warm series by starting with Stay Warm! – Retro Respect.
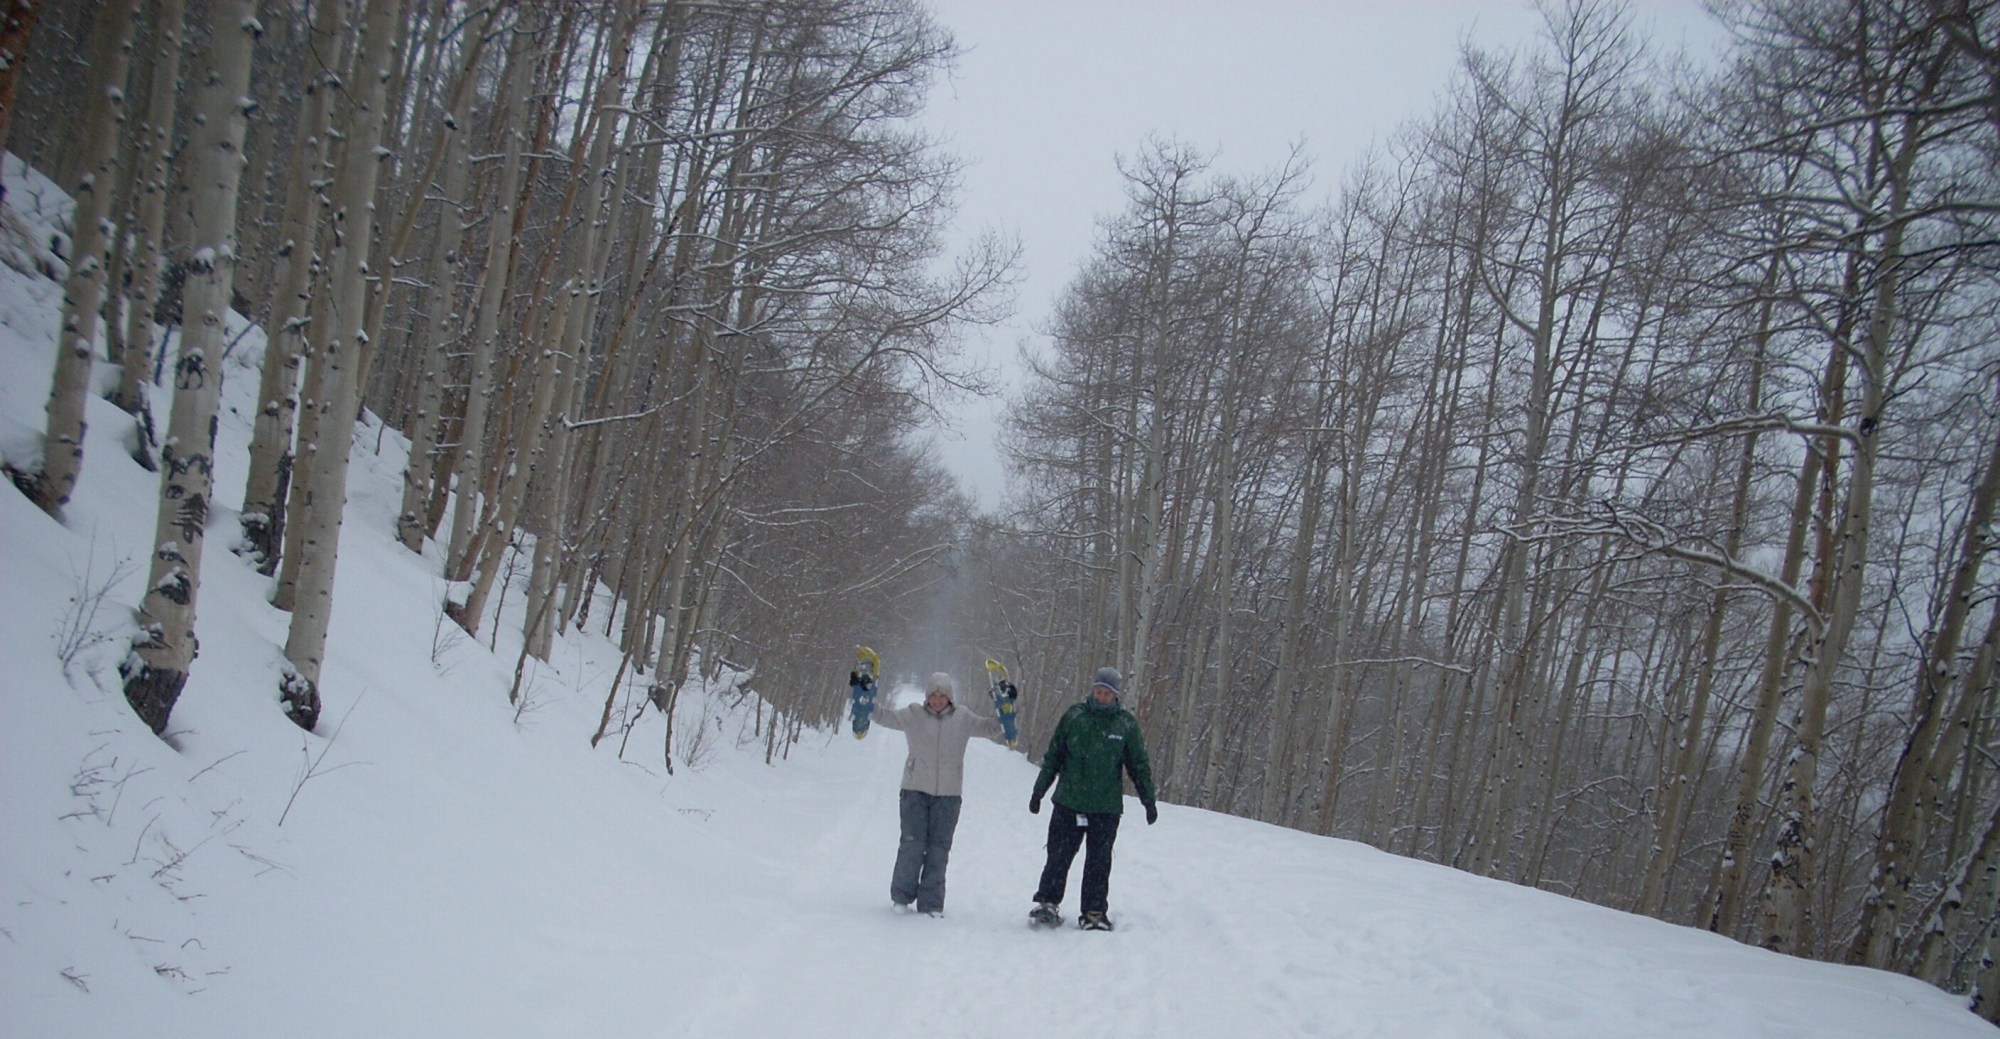
This series will focus on the equipment you might encounter as you start venturing on to the snow. To keep things simple, we are going to start out on with the most straightforward activity, walking. Ok, maybe we’ll make it slightly more complicated by walking on snow. But, if you’d prefer to avoid crowds and get in touch with nature, this is the best way to get started on loving the wintertime.
Depending on conditions and your trail choice, this may be as simple as wearing just a pair of warm boots. However, if you do decide to trek out where you could be breaking new trail, a good pair of snowshoes will be required. You may have seen older snowshoes in the movies or hung up on the wall and thought good grief those things are enormous and look impossible to walk in. Don’t worry; modern snowshoes are much smaller and more manageable.
Before you go run out to the store and buy a pair of snowshoes, take a moment to search on Facebook, Travel Zoo, or Groupon for various planned outings that include trip planning, the snowshoe rentals, and sometimes a meal or a wine tasting. We will share a couple of examples in the comments section of this posts. Depending on when you read this article you might miss these, but they usually pop up just by searching for snowshoe in the appropriate. The best part of these events is the ability to meet with other people trying out the sport and possibly make a new friendship or two. As we will get to shortly, having a friend to go with for future trips will not only be nice, but essential.
Once you decided to go to the next step and buy a pair of snowshoes, keep the cost simple by buying a basic set up. There are lot manufacturers out there that make snowshoes. Some brands you’ll likely run into include Atlas, Louis Garneau, MSR, Tubbs, and Yukon Charlies. Personally, we have always stuck with Yukon Charlies based on their affordability and the availability of an all in one kit. These kits include poles and bag and sell at an affordable price point at places like Costco. Many of the other brands are close to $200 just for the shoes, but the Yukon Charlies run just under $130 for everything at the time of publication. While the other brands are lighter and engineered for steeper terrain, these factors are overkill when you are just getting started. Don’t worry; these are not cheap knock-offs. We have completed very tough back county hut trips in our shoes, and they worked great.
 That said, there’s only one factor to consider when picking out your snowshoes, your weight and how much gear you will be carrying. There are also woman specific shoes that are more tailored to your stance and weight. If you are just getting started, then you’ll likely bring about 10 lbs once you add in the clothing you wear, a bit of water, and some snacks. Later on, however, you may want to venture further, so consider up to 50 lbs down the road. However, you might find the larger shoes end up being a bit awkward when you go for a casual hike. I have ended up with two sets of snowshoes these days one for occasional walks and another for more massive loads.
A great place to start your snowshoeing adventure is at a Nordic center at or close by one of the resorts. Often these are golf courses during the summer, and once the snow covers up the grass, the course flips over to a maintained nordic center. The benefit of a Nordic center is they typically groom trails throughout the area, and you are never too far from the hut to go warm up. The advantage of groom trails is it is hard enough to walk on without your snowshoes in case something goes wrong. That said, please try not to hike or snowshoe over the parallel grooves that are on the trail, these are for cross-country skiers, and they won’t be very friendly to you if you mess those up.
 If you want to treat yourself, we are a huge fan of the Nordic center at Ski Cooper in Leadville, Co. At the top of the hill, they have a beautiful place to grab lunch or dinner at a yurt called the Tennesee Pass Cookhouse run by owners Ty and Roxanne Hall. While the price tag is not quite what you might consider “affordable,” we would be remiss for not mentioning this gem, plus the menu alone will motivate you to start snowshoeing.
This rustic yurt sits at an overlook with views of both Mt Elbert and Mt Massive, two of the tallest 14ers in Colorado. Take in the views from the deck while you enjoy a glass of wine from their extensive wine list or one of their craft brews. Inside, you will find a candlelit dining room with a roaring fire keeping the yurt warm. You will also enjoy
music playing softly in the background. The last time we went, the sounds of Frank Sinatra Radio from SiriusXM and it was the perfect touch.
You will need to make a reservation before you arrive as they are popular and they have to haul your order to the hut for preparation. For lunch, the cookhouse offers a bison burger, salmon tacos, a portabello burger, or, my favorite, the pulled pork quesadilla. Dinner options include rack of lamb, blackened rainbow trout, elk tenderloin, a roasted pheasant, or risotto cakes covered in a wild mushroom red sauce.
If all this sounds like too much and you’d rather just get away from it all, another and cheaper option is to find your favorite trail that you might hike in the summer and go for a hike. However, please be well aware of the Avalanche risk for the area and always go with a friend. If you are not sure or alone, don’t go! There are a ton of avalanche awareness classes available for free from the Friends of Berthoud Pass. Take one of them before you plan your first trip
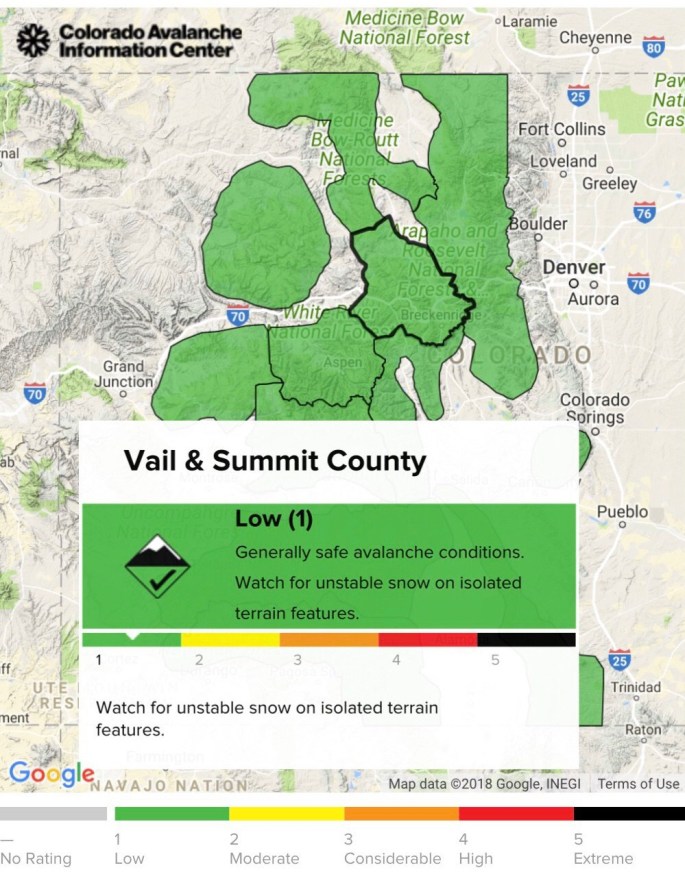 One you do have Avalanche awareness and perhaps go one step further to get level 1 certified, you can use the Colorado Avalanche Information Center or CAIC, Hillmap, and CalTopo to plan your back or side country route. Our friends at Weston Snowboards, an industry disruptor on split-boards, turned us onto these fantastic resources. Bottomline, check these resources the night before and the day of for your desired route to ensure you are not putting yourself in harm’s way.
Don’t let this scare you. Avalanche awareness and training not as intimidating as it sounds. We give this information because we care about our readership and we would be horrified if someone ended up hurt or worse dead. Personally, I previously was ignorant and I never even thought about avalanche risk while I was snowshoeing. Looking back, I’m sure I’ve been putting friends and myself at risk. It was dumb!! I genuinely wish I had heard about avalanche risk before now.
Hope you can get out there and start to experience the joy of winter sports. We know it’s hard to take the first step and we are really proud of you for coming this far. We will continue our series next week with our attention shifting to fat bikes. So be sure to tune in for that.
Until next time, pray for snow and celebrate when Ullr Provides!!!

2 thoughts on “All bundled up, now what? – Snowshoeing is a good place to start!”
Comments are closed.